Ombré Cake Pops
There is something so insanely precious about cake pops. They’re so freakin’ adorable, so easy to make, and they can be so versatile. Once you get the basics down of making a cake pop, the possibilities are endless!

To make simple cake pops, just follow these steps:
- make a cake
- make frosting
- crumble cake into teeny weeny pieces
- add frosting to the crumbled cake
- mix
- roll into balls
- dip
- indulge!
For the ease of this blog post, a simple box cake and already prepared frosting will work just fine. The main difference of using a box mix versus making a cake and frosting from scratch is the taste of each cake pop. You know what ingredients are in the homemade cake and they’re truly special because the cake was made by you with love!
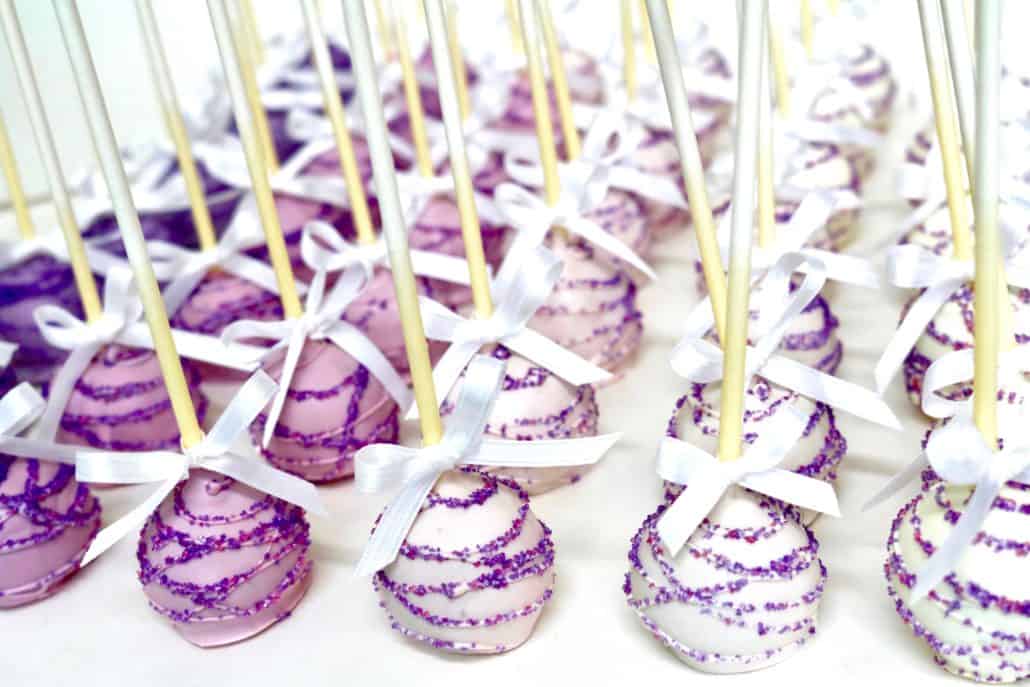
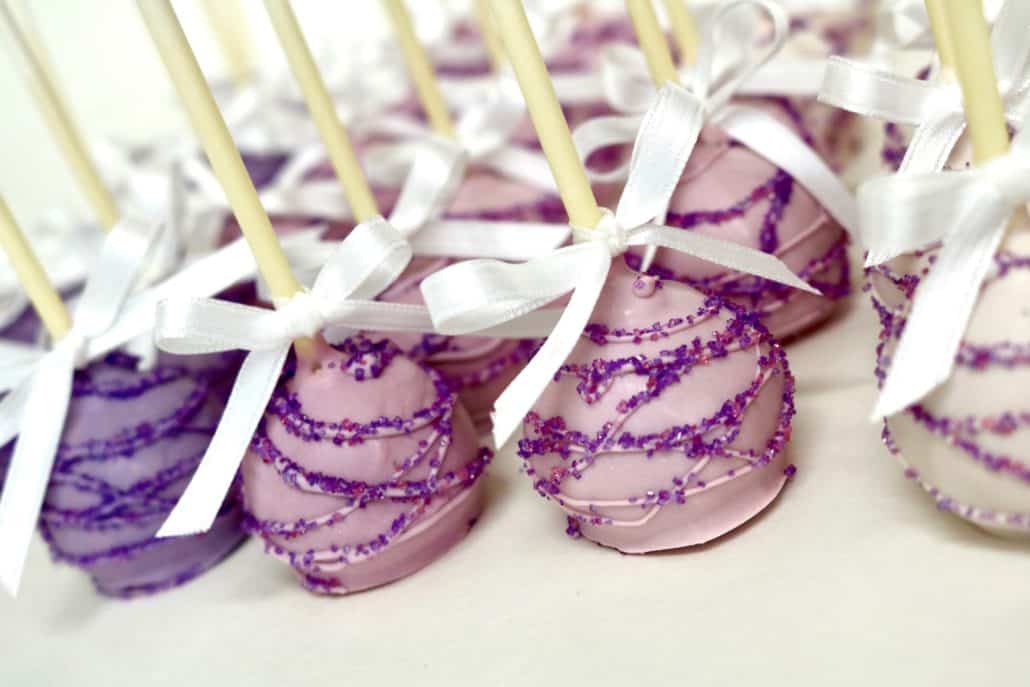
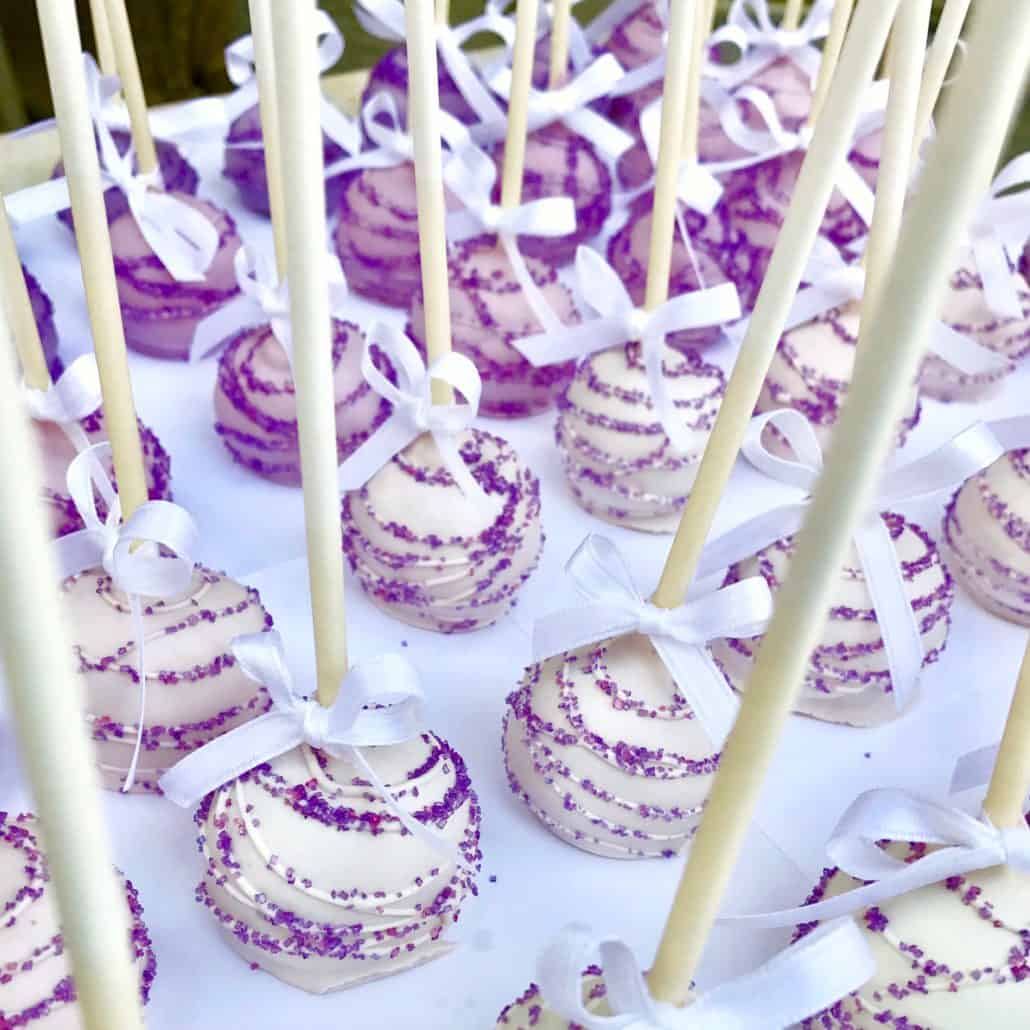
I was making desserts for a wedding and the bride wanted cake pops that were similar to the color of her bridesmaids dresses – lavender. Because I’ve made cake pops several times before, I wanted to spice up the pops just a tad. I was excited to present the bride with ombre cake pops!
Now before I get down to the nitty gritty of how to make these ombre cake pops, take a looksy at some pro tips one might need:
- Let the cake cool completely before starting to mix with the frosting. You may even want to let the cake cool overnight.
- If using store bought frosting, only use about 3/4 of the frosting tub. You can always add more frosting, but you can’t remove the frosting if you’ve added in too much.
- When rolling the inch and a half ball of cake and frosting, put the balls in the fridge for a couple of hours or in the freezer for one hour. We don’t want the cake balls to be completely frozen, we just want them to be hardened. THEN, remove from the fridge/freezer and roll again to make sure they are smooth as silk.
- To make sure the cake ball stays on the stick when dunking, dip half an inch to an inch of the top of the lollipop stick into the melted chocolate and then stick it into the center of the cake ball. Let harden completely.
- To avoid cracks in the chocolate that has hardened around the cake pop, make sure the melted chocolate isn’t too hot. When the cold cake pop comes in contact with insane heat, the temperature combination will force the chocolate to crack. I would recommend leaving the chocolate out to cool slightly before dipping the cake pop.
And a quick fun fact about cake pops – they freeze so incredibly well! You can make them weeks before an event and they’ll be absolutely perfect. They keep in the freezer for up to 6 weeks so feel free to take your time with these puppies!
Now let’s get down to business, shall we?! In my recipe below, I have a homemade chocolate cake and homemade chocolate frosting, but again, a box cake mix and store bought frosting will work as well.
Enjoy, friends!!
Ombre Cake Pops


Ingredients
For the chocolate buttermilk cake:
- 1 cup unsalted butter
- 6 tbsp. cocoa
- splash of oil
- 1 cup water
- 2 1/4 cup flour
- 2 cups sugar
- 1 tsp baking soda
- 1/2 tsp salt
- 1 tsp vanilla
- 1/2 cup buttermilk
- 2 eggs
For the chocolate frosting:
- 1/4 cup buttermilk
- 1/2 cup melted butter
- 3 tbsp. cocoa
- powdered sugar (until the frosting is thick enough)
For the coating:
- white chocolate (or any color melting chocolate)
- sprinkles
Instructions
- Preheat oven to 350 degrees. Grease a 9x13 pan.
- Make the cake: in a microwavable bowl, mix melted butter, cocoa, oil, and water together. Set aside.
- In a large bowl with an electric mixture, combine flour, sugar, baking soda, and salt. Mix well.
- Add in chocolate mixture. Mix well.
- Add vanilla, buttermilk, and eggs. The mixture will be runny.
- Pour batter into the greased baking pan and bake for 30 minutes.
- Remove from oven and let cool.
- Make the frosting: in a large bowl with an electric mixer, combine buttermilk, melted butter, and cocoa. Slowly incorporate powdered sugar until it reaches the consistency you prefer. I tend to add in about 2.5 cups of powdered sugar, but it’s all up to your liking.
- Using your hands, crumble the cooled cake into a bowl. Make sure there are no large clumps of cake. Add in half of the frosting and mix well with your hands. You can use an electric mixer for this part if you want to keep your hands clean.
- Grab a small amount of the moist cake mixture and roll it into a ball. The cake ball should be about 1.5 inches round. If you need more, feel free to grab more.
- Place all of the cake balls on a wax lined baking sheet. Refrigerate for at least two hours or place in the freezer for 1 hour.
- Remove from fridge/freezer and re-roll the chilled balls to smooth out. Place back into the fridge.
- In a microwavable mug, melt 2 cups of white chocolate at half speed in 30 second intervals. Once the chocolate is melted completely, dip half and inch to an inch of one a lollipop stick into the melted chocolate and stick into the center of each ball. When not working with the individual cake balls, make sure the balls remain in the fridge.
- Fully submerge each cake pop into the white chocolate, making sure each part of the cake ball is fully covered. Be sure that the chocolate covers the base of the cake ball, all the way up to the stick.
- Gently tap the lollipop stick against the rim of the cup to remove all excess chocolate. Place the cake pop stick on a wax lined baking sheet so that the lollipop stick is pointing directly to the sky.
- Let the chocolate harden around the cake pop.
- Slowly add drops of purple food coloring, dipping more cake balls after each addition of a purple dye drop.
- Feel free to drizzle and decorate as you wish - sprinkles, nonpareils, drizzle, etc. The possibilities are endless!
- Store cake pops in the fridge for up to one week or in the freezer for up to 6 weeks.
- Bon appétit!


